Today we will learn how to create a purchase order, then proceed with the good receipt then after we will proceed with the invoicing. The purchase order is a piece of document which allows you to purchase a goods or services to a supplier.
Step 1:
Go on the following menu:
Main Menu --> Departments --> Purchasing --> Order Processing --> Purchase Order.

Step 2:
Click on the button New and fill the information.

| General | |
| No. | If no series is setup, purchase order number will generate automatically |
| Buy-from vendor no. | Enter vendor number |
| Vendor | Vendor name will display automatically |
| File ref | Enter file reference if there is |
| Remarks | Enter a remark if there is |
| Buy-from | |
| Address | Address will display automatically |
| Address 2 | Address will display automatically |
| Post Code | Post Code will display automatically |
| City | City will display automatically |
| Contact no | Choose a contact person if the vendor has one |
| Contact | The name of the contact person will display automatically |
| Document Date | Enter document date |
| Posting Date | Enter posting date |
| Due Date | Enter due date |
| Vendor Invoice No | Enter the vendor invoice number |
| Order Date | Enter the order date |
| Quote No | If purchase order has been created from a quote the quote number will display here |
| Status | Status of the purchase order |
| Prepared By | State who has created this purchase order |
| Lines | |
| Type | Enter the type |
| Line No | Line Number will display automatically |
| No | Enter the type number |
| VAT Prod Posting Group | Enter a vat production posting group |
| Gen Prod Posting Group | Enter a general product posting group |
| Description | The description of the type chosen will appear here |
| Description 2 | Enter a second description if you have |
| Location Code | Enter a location code if you have |
| Quantity | Enter the quantity |
| Direct Unit Cost Excl VAT | Enter the direct unit cost |
| Line Amount Excl VAT | Quantity * direct unit cost |
| Line Discount % | Enter a discount percentage if you have |
| Line Discount Amount | Enter a discount amount if you have |
| Quantity Received | The quantity received will be adjusted automatically |

| Invoice Details | |
| Currency Code | If purchase order is in foreign currency |
| Global Dimension 1 | Enter a global dimension 1 if you have |
| Global Dimension 2 | Enter a global dimension 2 if you have |
| Location Code | Enter a location code |
| Sell-to customer No | Enter the sell-to customer if you have |
| Expected Receipt Date | Enter the receipt date of the item or services |
| Shipping and Payment | |
| Ship-to | |
| Code | Enter a shipment code if you wish to ship the item to another location |
| Name | Enter destination vendor name |
| Address | Enter destination address |
| Address 2 | Enter destination address |
| Post Code | Enter destination post code |
| City | Enter destination city |
| Contact | if the vendor has a contact enter is here |
| Pay-to | |
| Name | If you wish to pay another vendor, enter the name here |
| Address | Enter address |
| Address 2 | Enter address |
| Post Code | Enter post code |
| City | Enter city |
| Contact No | If the vendor has a contact person, enter the contact no |
| Contact | Name of the contact person will appear automatically |
Step 3:
Click the button Print to get a hard copy of the purchase order to send the vendor.
Step 4:
Release the status of the purchase order, click on the button release.
Step 5:
Click on Post and choose receive. This is done when goods is received in the stock
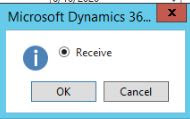
Step 6:
Click again on Post and choose invoice. This is done when invoice is being done for payment.

Click on OK to close