Thursday, June 11, 2020

Sales order creation on Microsoft Dynamics Nav Business Central

Dear Friends,

Today we will learn how to create a sales order, it is a piece a document that is used to buy goods or services to a customer.

Step 1:

go on the following menu:

Main Menu --> Sales & Marketing --> Order Processing --> Sales order


Step 2:

Click on the button New and fill the information.


General
Customer NoEnter the customer code here
Customer NameCustomer name will display automatically
Sell-to
AddressCustomer address will display automatically
Address 2Customer address will display automatically
CityCity will display automatically
Post CodePost code of the customer will display automatically
Country/Region CodeRegion code will display automatically
Contact NoIf the customer has a contact person, choose the contact no
Contact NameThe name of the contact person will display automatically
Document DateEnter document date
Posting DateEnter posting date
Order DateEnter order date
Due DateDue date will be calculated automatically
External Document NoIf you have any important number related to the sales order enter it here
StatusStatus of the sales order.
Lines
TypeEnter the type
NoChoose the type
DescriptionDescription of the chosen type will display automatically
Location CodeEnter the location code
QuantityEnter the quantity
Unit of MeasureEnter the unit of measure
Unit Price Excl VATEnter the price excluding vat
Line Amount Excl VATQuantity * Unit Price
Line Discount %Enter discount percentage if you want to give
Qty to shipIt will be populated automatically
Quantity ShippedIt will be populated automatically
Qty to invoiceIt will be populated automatically
Quantity InvoicedIt will be populated automatically
VAT Prod. Posting GroupEnter the vat product posting group
Gen. Prod. Posting GroupEnter the general product posting group
Line Discount AmountIf want to give a discount amount
Line NoLine number will display automatically


Invoice Details
Currency CodeIf it is a foreign invoice, choose the currency
Global Dimension 1Enter Global Dimension 1
Global Dimension 2Enter Global Dimension 2
Shipping and Billing
Ship-toIf you want to ship the item to another location
CodeEnter shipment code
NameThe name will appear automatically
AddressAddress will appear automatically
Address 2Address will appear automatically
CityCity will appear automatically
Post CodePost code will appear automatically
Country/RegionRegion code will appear automatically
ContactEnter the name of the contact person there
Bill-toIf you want to sent the bill to another person
NameEnter the name of the customer
AddressAddress of the customer will appear automatically
Address 2Address of the customer will appear automatically
CityCity of the customer will appear automatically
Post CodePost code will appear automatically
Country/Region CodeRegion code will appear automatically
Contact NoIf the customer has a contact person, enter the contact code
Contactthe name of the contact person will appear automatically
Location CodeLocation code of the customer will appear automatically

Step 2:

Click on the button Release.


Step 3:

Click on the button Post.
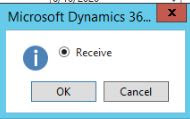

Step 4:

Choose ship and click on OK


Step 5:

Choose Invoice and click on OK.


After Clicking on OK the system will validate all account.

Wednesday, June 10, 2020

Purchase Order Creation on Microsoft Dynamics Nav Business Central

Dear Friends,

Today we will learn how to create a purchase order, then proceed with the good receipt then after we will proceed with the invoicing. The purchase order is a piece of document which allows you to purchase a goods or services to a supplier.

Step 1:

Go on the following menu:

Main Menu --> Departments --> Purchasing --> Order Processing --> Purchase Order.


Step 2:

Click on the button New and fill the information.


General
No.If no series is setup, purchase order number will generate automatically
Buy-from vendor no.Enter vendor number
VendorVendor name will display automatically
File refEnter file reference if there is
RemarksEnter a remark if there is
Buy-from
AddressAddress will display automatically
Address 2Address will display automatically
Post CodePost Code will display automatically
CityCity will display automatically
Contact noChoose a contact person if the vendor has one
ContactThe name of the contact person will display automatically
Document DateEnter document date
Posting DateEnter posting date
Due DateEnter due date
Vendor Invoice NoEnter the vendor invoice number
Order DateEnter the order date
Quote NoIf purchase order has been created from a quote the quote number will display here
StatusStatus of the purchase order
Prepared ByState who has created this purchase order
Lines
TypeEnter the type
Line NoLine Number will display automatically
NoEnter the type number
VAT Prod Posting GroupEnter a vat production posting group
Gen Prod Posting GroupEnter a general product posting group
DescriptionThe description of the type chosen will appear here
Description 2Enter a second description if you have
Location CodeEnter a location code if you have
QuantityEnter the quantity
Direct Unit Cost Excl VATEnter the direct unit cost
Line Amount Excl VATQuantity * direct unit cost
Line Discount %Enter a discount percentage if you have
Line Discount AmountEnter a discount amount if you have
Quantity ReceivedThe quantity received will be adjusted automatically


Invoice Details
Currency Code
If purchase order is in foreign currency
Global Dimension 1Enter a global dimension 1 if you have
Global Dimension 2Enter a global dimension 2 if you have
Location CodeEnter a location code
Sell-to customer NoEnter the sell-to customer if you have
Expected Receipt DateEnter the receipt date of the item or services
Shipping and Payment
Ship-to
CodeEnter a shipment code if you wish to ship the item to another location
NameEnter destination vendor name
AddressEnter destination address
Address 2Enter destination address
Post CodeEnter destination post code
CityEnter destination city
Contactif the vendor has a contact enter is here
Pay-to
NameIf you wish to pay another vendor, enter the name here
AddressEnter address
Address 2Enter address
Post CodeEnter post code
CityEnter city
Contact NoIf the vendor has a contact person, enter the contact no
ContactName of the contact person will appear automatically

Step 3:

Click the button Print to get a hard copy of the purchase order to send the vendor.


Step 4:

Release the status of the purchase order, click on the button release.


Step 5:

Click on Post and choose receive. This is done when goods is received in the stock


Step 6:

Click again on Post and choose invoice. This is done when invoice is being done for payment.


Click on OK to close

Tuesday, June 9, 2020

Item Journal on Microsoft Dynamics Nav Business Central

Dear Friends,

Today's tutorial is about using item journal. The use of this journal is when we need to make adjustment of stock in term of quantity.

Step 1:

To access the journal go on the following menu:

Main Menu --> Departments --> Purchasing --> Inventory & Costing --> Item Journal.


Step 2:

Fill the following information.

Line Noline number will be populated automatically
Posting DateEnter the posting date
Entry TypeEnter the entry type
Document NoIf no series is setup the number will be generated automatically else enter manually
Item NoEnter the item number
DescriptionThe item description will display automatically
Location CodeEnter the location code
QuantityEnter the quantity
Unit of MeasureEnter the unit of measure
Unit Amountin case of sales enter the unit amount
AmountQuantity * Unit Amount or Quantity * Unit cost
Discount AmountIf there is a discount enter it
Unit CostIn case of purchase enter the unit cost
Shortcut Dimension CodeEnter a shortcut dimension if there is.
Applies-to EntryIf you want to link the transaction to a item ledger entry
Bin CodeEnter a bin code is there is
Shpt. Method CodeEnter a shipment code if there is

Step 3:

Click on Post to validate the transaction.


Click on OK to close.