Monday, April 6, 2020

Setup General Ledger Setup on Microsoft Dynamics Nav Business Central

Hello Guys,

Today's tutorial is about setting up the general ledger setup.  This configuration is essential due to its impact on various parts of the ERP.

To proceed with the setup, go on the following menu:

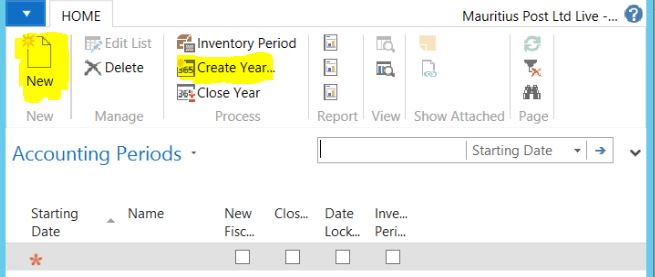
Main Menu --> Department --> Financial Setup --> Setup --> General Ledger Setup

Allow Posting FromEnter when the user can post transaction
Allow Posting ToEnter till when the user can post transaction
Register TimeThis field allows a user to register time on the system
Local Address FormatEnter the format of the employer local address
Local Cont. addr formatAlways select after company name
inv. rounding precision (LCY)This will show the rounding of amount for invoices
inv. rounding type (LCY)Always choose nearest
Amount rounding precision (LCY)Rounding of amount in the system
Amount decimal places (LCY)Specify the decimal place for amount
Unit-amount rounding precision (LCY)Rounding of unit amount in the system
Unit-amount decimal places (LCY)Specify the unit amount decimal places
Allow G/L Acc deletion beforeIf you want to prevent delete a G/L as from a date
Check G/L Acc UsuageThis will check if the G/L has been used before deletion
EMU currencyThis will convert any amount to EUR currency
LCY CodeEnter the local currency code
Local currency symbolEnter the symbol of the local currency
Local currency descriptionEnter the description of the local currency
pmt. disc excl VATExclude VAT on payment discount
Adjust for payment discAdjustment on payment discount
Unrealised VATIf you wish to post VAT amount to a temporary account first then when the transaction is completed the amount will be transfer to the VAT account
Prepayment unrealised VATIf you wish to post prepayment VAT to a temporary account first then after completing the transaction the amount will transfer to the prepayment VAT account
Max vat difference allowedThis will show you the range allow to change vat amount in invoices
Tax invoiced renaming thresholdLet the threshold amount be 0.00
Vat rounding typeSpecify the vat rounding type
Bank Account NosNo series for bank account number
Bill-to / Sell-to vat calcVAT will be calculated on bill-to or sell-to
Print vat specification on LCYIf this field is checked, the system will set the vat amount in local currency
use legacy G/L Entry lockingThis field lock the G/L entry table when posting date, this prevent data mixing.
show amountSet this to amount only

Setting up global dimension

Dimension is used for analytical analysis


To add a global dimension click on the button Change Global Dimensions

Enter the global dimension 1 and global dimension 2 then click on the button start.

Setting up shortcut dimension code

                            
Enter the dimension directly.

I hope that this tutorial has been of help to you.  Follow me for more tutorials.

Create an accounting period on Microsoft Dynamics Nav Business Central

Dear friends,

In today's tutorial, I will show you how to create an accounting period. It is very important to create an accounting period because this defines the period when transaction can be done.

To proceed with the creation on the accounting period,

Step 1:

Go on the following menu:

Main Menu --> Department --> Financial Management --> Setup --> Accounting Period.

Click on the button New


Step 2:

Click on the button Create Year.

a) Enter the start date of the financial year
b) Enter the no of period (normally 12 months)
c) Enter the period length (1 M = 1 Month)
d) Then click on OK

After clicking on OK, you will see the system will generate the 12 month period.

Sunday, April 5, 2020

Add a currency on Microsoft Dynamics Nav Business Central

Hello friends,

Currency on Microsoft Dynamics Nav Business Central is used for the automatic conversion of foreign currencies.  In today's tutorial, we will learn how to set up Currencies on the system.

Step 1:

To add a currency go on the following path:

Main Menu --> Department --> Financial Management --> Setup --> General --> Currencies


Add the following information:

CodeEnter a code for the currency
DescriptionGive a description to the currency

Step 2:

After creating the currency we need to enter the exchange rate for the currency so that the system can do the conversion.

To create an exchange, click on the button Exch. Rate and then on the button New.


Now add the following information:

Starting DateThe date the exchange rate will be effective
Currency CodeThe currency code
Relational CurrencyLet this field be blank
Exchange Rate AmountUse 1.0
Relation Exch. Rate AmountEnter the currency exchange rate
Adjustment Exch Rate AmountLet the amount to 0.0
Relational Adjmt Exch Rate AmtLet the amount to 0.0
Fix Exchange Rate AmountLet the field be Currency

Note: whenever you need to change the exchange rate, do not discard the old one.  Just add a new line with a new effective date. The aim is to keep a history of the exchange rate.

Hopefully, this tutorial answers your questions. Follow me for more tutorials on Microsoft Dynamics NAV Business Central and get cracking!

Add a No. Series and No. Series Line on Microsoft Dynamics Nav Business Central

Hello Friends,

In this tutorial, we will learn how to add a no. series and no. series line. No. series is an important setup on NAV which will allow the system to generate document no when doing a transaction.

To proceed with the setup, go on the following menu:

Step 1:

Main Menu --> Department --> Administration --> Application Setup --> General --> No. Series


Step 2:

Click on the button new


You need to add the following information:

Code Give a code to the no. series
DescriptionGive a description to the no. series
Starting NoThis setup will be done in line
Ending NoThis setup will be done in line
Last date usedthe last date the no. series has been used on the system
Last no. usedThe last number used on the system
Default nosDefault number will prevent someone entering a document no by their own
Manual nosManual number will allow the user to enter a specific document no by their own
Date OrderThis field will allow us to order the date

Step 3:

To add a line for this no. series click on the button line.


Enter the following information:

Starting Date Date when the number will be effective
Starting NoThe first number the system will generate
Ending NoThe last number you wish to generate from the system
Last date usedThe last date the no. series has been used on the system
Last no. usedThe last number used on the system
Warning NoThe last number which will alert the user that no series is near over
Increment by noStates the number that the system will increment
OpenIndicates that the no series line is open


Close page.


Change Company Information on Microsoft Dynamics Nav Business Central

Hello Friends,

In today's tutorial, I will show you how to change company information on Microsoft Dynamics Nav Business Central.

Steps:

  • Open Navision and go on the following menu:
  • Main Menu --> Department --> Administration --> Application Setup --> General --> Company Information


  • Fill all necessary information such as Name, Address and etc.
  • Close the page Company Information.