Thursday, May 28, 2020

Item creation on Microsoft Dynamics Nav Business Central

Dear Friends,

Today's tutorial is about creating an item. It is an physical article that is bought to be used in the company or sell to a customer. An item is stored in a stock, when item is being bought, the stock is debited and when item is being sold, the stock is being credited.

Step 1:

Go on the following menu:

Purchasing

Main Menu --> Department --> Purchasing --> Inventory & Costing --> Items

Sales

Main Menu --> Department --> Purchasing --> Sales & Marketing--> Items


Step 2:

Click on the button New and enter the following information.


Item
NoIf no series is setup then the item no will generate automatically
DescriptionEnter the description of the item
Base Unit of MeasureEnter the unit of measure of the item
Item Category CodeEnter the item category code
Inventory
Shelf NoEnter the shelf no
Created from Catalog ItemIf you want to create from a catalog item
Search DescriptionSearch description will be set as description
InventoryThis will show the stock count
Qty. on Purch. OrderThis will show the quantity use on purchase order
Qty. on Prod. OrderThis will show the quantity use on production order
Qty. on Component LinesThis will show the quantity use on component lines
Qty. on Sales OrderThis will show the quantity use on sales order
Qty. on Service OrderThis will show the quantity use on service order
Qty. on Job OrderThis will show the quantity use on job order
Qty. on Assembly OrderThis will show the quantity use on assembly order
Qty. on Asm. ComponentThis will show the quantity use on assembly component
Stockout WarningIf you wish to get an alert if stock amount is zero
Prevent Negative InventoryThis will prevent any negative inventory
Net WeightEnter the net weight
Gross WeightEnter then gross weight
Unit VolumeEnter the unit volume
Costs & Pricing
Cost Details
Costing MethodEnter the costing method
Standard CostThe standard cost will display automatically
Unit CostUnit cost of the item will display automatically
Special Purch. Prices & DiscountsIf you want to create a special purchase price and discount
Posting Details
Gen. Prod. Posting GroupEnter the general product posting group
VAT Prod. Posting GroupEnter the VAT product posting group
Inventory Posting GroupEnter the inventory posting group


Prices & Sales
Unit priceThe last unit price for of the item will display here
Planning
Dampener QuantityThe dampener quantity will appear automatically
Order Modifiers
Order MultipleThe order multiple will display automatically

Click on OK to close

Standard Sales Code On Microsoft Dynamics Nav Business Central

Hello Friends,

Today we will learn how to create a standard sales code. The aim of using sales code is to allow the user to create invoice with the same invoice line.

Step 1:

Main Menu --> Department --> Financial Management --> Receivable --> Setup --> Standard Sales Code.


Step 2:

Click on the button New and fill the information.


General
CodeEnter a code for the standard code
DescriptionEnter a description
Currency CodeEnter a currency code if the invoice is foreign
Lines
TypeEnter a type for the line
NoEnter the no of the type
DescriptionThe description will appear automatically
QuantityEnter the quantity

Click on OK to close.

Sales & Receivables Setup on Microsoft Dynamics Nav Business Central

Dear Friends,

Today's tutorial we will learn how to configure sales & receivable setup.

Step 1:

Go on the following menu:

Main Menu --> Department --> Financial Management --> Receivables --> Setup --> Sales & Receivables Setup.

Step 2:

Fill the information:


General
Discount PostingChoose the type of discount posting
Credit WarningsIf you want to give a warning about credit
Stockout WarningGive warning message when stock out
Shipment on InvoiceAllow shipment on invoice
Return Receipt on Credit MemosIf you want to return receipt on credit memo
Invoice RoundingIf you want to round invoice amount
Default Item QuantityIf you want to default Item quantity on an invoice
Create Item from Item NoIf you want to create item from item no 
Create Item from DescriptionIf you want to create item from description
Ext. Doc. No. MandatoryIf you want to make external document number mandatory
Appln. between Currencies.If you want to do application between currencies
Logo Position on DocumentsState the position of logo on document such as invoice
Freight G/L Acc. NoEnter the freight G/L Account
Default Posting DateState how you wish to set the posting date
Default Quantity to shipIf you want to default the ship to quantity
Copy Comments Blanket to OrderIf you wish to copy comment from blanket order to sales order
Copy Comments Order to InvoiceIf you wish to copy comment from sale order to sale invoice
Copy Comments Order to Shpt.If you wish to copy comments from sale order to sale shipment
Copy Cmts. Ret. Ord. to Cr. MemoIf you wish to copy Comment from return order to credit memo
Copy Cmts. Ret. Ord. to Ret. RcptIf you wish to copy comment from return order to receipt
Allow VAT DifferenceAllow vat difference on invoices
Calc. Inv. DiscountAllow calculation on invoice discount
VAT Bus. Posting Gr. (Price)Set a default vat business posting group for pricing
Exact cost reversing mandatoryIf you wish want exact cost when doing reversal
Check Prepmt. when PostingCheck if there is prepayment before posting the payment.
Prepmt. Auto Update FrequencyFrequency to update prepayment 
Allow Document Deletion BeforeSet a date to allow deletion of document
Ignore Updated AddressesIf you wish addresses is ignored in document
Skip Manual Reservationprevent manual reservation.
Quote Validity CalculationEnter the calculation for quote validity
Dimensions
Customer Group Dimension CodeEnter the customer group dimension code
Salesperson Dimension CodeEnter the salesperson dimension code


Number Series
Customer NoEnter no series for customer
Quote Nos.Enter no series for quote
Blanket Order NosEnter no series blanket order
Order NosEnter no series for order
Return Order Nos.Enter no series for return order
Invoice Nos.Enter no series for invoice
Posted Invoice NosEnter no series for posted invoice
Credit Memos NosEnter no series for credit memo
Posted Credit Memos Nos.Enter no series for posted credit memo
Posted Shipment Nos.Enter no series for posted shipment
Posted Return Receipt NosEnter no series for return receipt
Reminder NosEnter no series for reminder
Issued Reminder NosEnter no series for issued reminder
Fin. Chrg. Memos NosEnter no series for finance charge memos
Issued Fin. Chrg Memos NosEnter no series for issued finance charge memo
Posted Prepmt Inv. NosEnter no series for posted prepayment invoice
Posted Prepmt Cr. Memo NosEnter no series for posted prepayment credit memo
Direct DebitEnter no series for direct debit.
Background Posting
Post with Job QueueIf you want to post transaction when job queue is run
Post & Print with Job QueueIf you want to post and print transaction when job queue is run
Job Queue Category CodeSelect a job queue category code
Notify On SuccessNotify when transaction has been execute successfully
Archiving
Archive QuotesIf you want to archive quote
Batch Archiving QuoteIf you want to activate batch archiving quote
Archive Blanket OrdersIf you want to archive blanket order
Archive OrdersIf you want to archive order
Archive Return Ordersif you want to archive return order
Dynamics 365 for sales
Write-in product typeSelect a write in product type
Write-in product noSelect a write in product number

Click OK to close.

Sunday, May 24, 2020

Creation of Standard Purchase Codes on Microsoft Dynamics Nav Business Central

Dear Friends,

Today's tutorial is on how to create a standard purchase code. A purchaser code is used when a purchase order or purchase invoice is always created with same number of line, type, quantity  monthly. This will prevent the user from entering the line each time.

Step 1:

Go on the following menu:

Main Menu --> Department --> Financial Management --> Payable --> Setup --> Standard Purchase Code.


Step 2:

Click on New and Fill the information.


General
CodeEnter a code for the standard purchase code
DescriptionEnter a description
Currency CodeEnter the currency code
Lines
TypeEnter the type
NoEnter type number
DescriptionDescription of the type will display
QuantityEnter the quantity
Amount Excl. VATEnter the Amount exclude vat

Click on OK to close

Payment Methods setup on Microsoft Dynamics Nav Business Central

Dear Friends,

Today we will learn how to configure Payment Methods.

Step 1:

Main Menu --> Department --> Financial Management --> Payable --> Setup --> Payment Methods.


Step 2:

Click on the button New and fill the information.

CodeEnter a code for the payment method
DescriptionEnter a description
Bal. Account TypeEnter the balance account type
Bal. Account No.Enter the G/L Account
Direct DebitState whether it is a direct debit or not
Direct Debit Pmt. Terms CodeEnter the payment term code for direct debit
Pmt. Export Line DefinitionEnter the payment export line definition
Bank Data Conversion Pmt. TypeEnter the bank data conversion payment type
Use for InvoicingState whether the payment method is used for invoicing or not

Click on OK to close.

Payment Terms setup on Microsoft Dynamics Nav Business Central.

Dear Friends,

Today we will learn how to configure a payment term.

Step 1:

Go on the following menu:

Main Menu --> Department --> Financial Management --> Payable --> Setup --> Payment Terms.


Step 2:

Click on the button New and fill the information.

CodeEnter a code for payment term
Due Date CalculationEnter the due date calculation
Discount Date CalculationEnter the discount date calculation
Discount %Enter the discount percentage
Calc. Pmt. Disc. on Cr. MemosIf you want to calculate payment discount on credit memos
DescriptionEnter a description for the payment term.

Click on OK to close.

Purchase & Payable Setup on Microsoft Dynamics Nav Business Central

Dear Friends,

Today we will learn how to configure purchase & payable setup.

Step 1:

Main Menu --> Department --> Financial Management --> Payables --> Setup --> Purchase & Payable Setup

Step 2:

Fill all the necessary information.


General
Discount PostingChoose the type of discount posting
Receipt on InvoiceIf you want to do receipt on invoice
Return Shipment on Credit MemosIf you want to do return shipment on credit memo
Invoice RoundingAllow rounding amounts in invoice
Create item from item no.Allow creating of item from item no
Ext. Doc. No. MandatoryMake external document number mandatory
Allow VAT DifferenceAllow vat difference
Calc. Inv. DiscountCalculate discount on invoices
Calc. Inv. Disc. Per VAT IDCalculate discount on invoices per vat group
Appln. Between CurrencyChoose the type of application for currencies
Copy Comments Blanket OrderAllow copy comment when creating blanket order
Copy Comments Order to InvoiceAllow copy comment order when creating invoice
Copy Comments Order to ReceiptAllow copy comment order when doing receipting
Copy Cmts Ret. Ord to Cr. MemosAllow copy comment return order to credit memos
Copy Cmts Ret. Ord to Ret. ShptAllow copy comment return order to return shipment
Exact Cost Reversing MandatoryAllow to reverse the exact cost
Check Prepmt. when postingCheck if pre-payment is done before posting
Prepmt. Auto update frequencyChoose the frequency for update of pre-payment
Default Posting DateChoose which date to take as posting date
Default Qty. to receiveChoose the default quantity for receive
Allow Document Deletion BeforeIf you want to put a restriction to prevent any deletion of document
TDS Posting AccountChoose the G/L Account to post TDS
VAT %Enter the legal VAT percentage on transaction
Ignore Updated AddressesIf you want to ignore any updated addresses


Number Series
Vendor NosEnter the no series to create vendor
Quote Nos
Blanket Order Nos
Order Nos
Return Nos
Invoice Nos
Posted Invoice Nos
Credit Memo Nos
Posted Credit Memo Nos
Posted Receipt Nos
Posted Return Shipment Nos
Posted Prepmt. Inv Nos
Posted Prepmt. Cr. Memo. Nos
Background Posting
Post with Job Queue
Post & Print with Job Queue
Job Queue Category Code
Notify on Success


Archiving
Archive QuoteEnter if to archive quote
Archive OrdersAllow archive orders
Archive Blanket OrdersAllow archive blanket orders
Archive Return OrdersAllow archive return orders
Default Accounts
Default Debit Account for Non-Item LinesEnter G/L Account to debit non-item line
Default Credit Account for Non-Item LinesEnter G/L Account to credit non-item line
Procurement
Prepare ByEnter the prepared by name to display on purchase order
Authorize ByEnter the Authorize By name to display on purchase order
Phone NoEnter Phone Number to display on purchase order
Fax NoEnter Fax number to display on purchase order
EmailEnter Email to display on purchase order
Bank Letter
Bank Letter SignEnter the person name on bank letter
Bank Letter Sign TitleEnter the title of the person on bank letter
Bank Letter Sign 1Enter a second person name on bank letter
Bank Letter Sign 1 TitleEnter the title of the person on bank letter
Bank Letter Sign 2Enter a third person name on bank letter
Bank Letter Sign 2 TitleEnter the title of the person on bank letter

Click on OK to close.

Wednesday, May 20, 2020

Sales Order Creation on Microsoft Dynamics Nav Business Central

Dear Friends,

Today we will learn how to create a sales order. It is an official document which represents the sale of goods or services to customers.

Step 1:

Go on the following menu.

Main Menu --> Department --> Sales & Marketing --> Order Processing --> Sales Order.


Step 2:

Click on the button New and fill all the information.


General
Customer No.Enter the customer code
Customer NameCustomer Name will appear automatically
Sell-to
AddressAddress will appear automatically
Address 2Address will appear automatically
CityCity will appear automatically
Post CodePost code will appear automatically
Country / Region CodeRegion code will appear automatically
Contact NoIf the customer has a contact person enter the contact number
ContactName of the contact will appear automatically
Document DateEnter Document date
Posting DateEnter Posting date
Due DateDue date will be calculated automatically
External Document NoEnter any extra important number
StatusStatus of the order
Lines
Line No.Line Number will display automatically
TypeEnter the type
No.Enter the type no
DescriptionEnter a description
Location CodeEnter a location code
QuantityEnter the quantity
Unit of measureEnter the unit of measure
Unit Price Excl. VATEnter the unit price
Line Amount Excl VATQuantity * Unit price
Line Discount %Enter line discount percentage if you need to give
Line Discount AmountEnter line discount amount if you need to give
Qty to ShipQty to ship will be same as quantity
Quantity ShippedThis will show how many will be shipped
Qty to invoiceQty to invoice will be same as quantity
Quantity InvoicedThis will show how many will be invoiced
VAT Prod Posting GroupEnter the VAT product posting group
Gen. Prod Posting GroupEnter the General product posting group


Invoice Details
Currency CodeEnter the currency code if the invoice is in foreign currency
Global Dimension 1Enter global dimension if there are
Global Dimension 2Enter global dimension if there are
Shipping and Billing
Ship-toIf the item need to be deliver to another address
ContactIf the new location has a contact person there
Bill-toIf payment will be paid by another customer
LocationEnter location Code

Step 3:

Click on Release to release the order.


After clicking on the button release the status will be set to Released.


Step 4:

Click on Post.


If the person need to do ship only, he will choose ship.


If the person need to do invoice only, he will choose invoice.


If the person need to do both, he will choose ship and invoice


Click on OK to close.

Tuesday, May 19, 2020

Purchase Order Creation on Microsoft Dynamics Nav Business Central

Dear Friends,

Today's tutorial is on the purchase order creation. A purchase order is a document that allows a company or an individual to buy a service or goods.

Step 1:

Go on the following menu:

Main Menu --> Department --> Purchasing --> Order Processing --> Purchase Order.


Step 2:

Click on the button New and enter the following information.


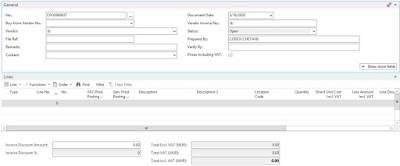
General
NoIf no series has been setup, the purchase order number will generate automatically
Buy-from vendor NoEnter the vendor number
VendorThe vendor name will display automatically
File RefEnter the file reference
RemarksEnter any remark
ContactIf the vendor has a contact person, the name will appear here
Document DateThe document date will display automatically
Posting DateThe posting date will display automatically or you can enter it manually
Due DateDue date will be calculated automatically
Vendor Invoice NoEnter the vendor invoice number
Order NoIf the purchase order has been created from a quote, the quote number will appear here
StatusStatus of the purchase order.
Lines
Line NoLine No will display automatically
TypeEnter the Type
NoEnter the Type No
VAT Prod Posting GroupEnter the VAT product posting group
Gen. Prod Posting GroupEnter the general product posting group
DescriptionThe name of the No will appear here
Description 2Enter a description
Location CodeEnter a location Code
QuantityEnter the quantity
Direct Unit CostEnter the unit cost
Line AmountQuantity * Unit Cost
Line Discount %Enter a discount in term of percentage
Line Discount AmountEnter a discount amount.


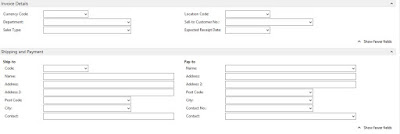
Invoice Details
Currency CodeEnter the currency code if the invoice is foreign
Global Dimension 1Enter Dimension if there is
Global Dimension 2Enter Dimension if there is
Location CodeEnter location code
Sell to customer noEnter the customer no
Expected Receipt DateEnter the date the product will be delivered
Shipping and Payment
Ship-toIf the product will be shiped to another location
CodeEnter Address Code
NameName will appear automatically
AddressAddress will appear automatically
Address 2Address will appear automatically
Post CodePost Code will appear automatically
CityCity will appear automatically
ContactContact will appear automatically
Pay-toif payment will be done to another vendor
NameChoose the vendor
AddressAddress will appear automatically
Address 2Address will appear automatically
Post CodePost code will appear automatically
CityCity will appear automatically
Contact NoIf the vendor has a specific contact person enter the number here
ContactName of the contact will appear automatically.

Step 3:

Click on the button Release.


This will set the status of the purchase order to Released.


The process above can be done via an approval process also.

Step 4:

Click on POST to validate the transaction.


Step 5:

If the person has receive as permission, he will be able to do receive only


If the person has invoice as permission, he will be able to do only invoice only


If the person has receive and invoice as permission, he will be able to do both at the same time.


Click OK to close.

Monday, May 18, 2020

Depreciation Book on Microsoft Dynamics Nav Business Central.


Dear Friends,

Today we will learn how to setup depreciation book.

Step 1:

Go on the following menu:

Main Menu --> Department --> Financial Management --> Fixed Asset --> Depreciation Book.


Step 2:

Click on the button New and fill the information.

General
CodeEnter a code for the depreciation book
DescriptionEnter a description for the book
Default Rounding AmountDefine the default rounding amount
Default Ending Book ValueDefine the default book value
Disposal Calculation MethodChoose the disposal calculation method
Subtract Disc. in Purch. Inv.Allow to deduce discount on purchase invoice with fixed asset
Allow Correction of DisposalAllow any correction on disposal
Allow Changes in Depr. FieldsAllow user to change depreciation field
VAT on Net Disposal EntriesAllow VAT on disposal
Allow Identical Document NoAllow user to use same document no on journal
Allow IndexationAllow fixed asset indentation from main asset.
Allow Depr. below zeroAllow depreciation amount below zero, that is negative book value
Allow more than 360/365 DaysAllow transaction more that 360/365 days in the fiscal year
Use FA Ledger CheckAllow the use of fixed asset ledger check
Use Rounding in periodic Depr.Round amount in periodic depreciation
Use same FA+G/L Posting DateUse same as the posting date for FA and G/L
Fiscal Year 365 Year.Use fixed fiscal year 365 days


Integration
G/L Integration - Acq CostAllow you to do transaction on acquisition G/L Account
G/L Integration - DepreciationAllow you to do transaction on depreciation G/L Account
G/L Integration - Write-DownAllow you to do transaction on write-down G/L Account
G/L Integration - AppreciationAllow you to do transaction on Appreciation G/L Account
G/L Integration - Custom 1Allow you to do transaction on custom process G/L Account
G/L Integration - Custom 2Allow you to do transaction on custom process G/L Account
G/L Integration - DisposalAllow you to do transaction on disposal G/L Account
G/L Integration - MaintenanceAllow you to do transaction on maintenance G/L Account
Duplication
Part of Duplication ListAllow the fixed asset to be part of the duplication list.
Use FA Exch. Rate in Duplic.Use the fixed asset exchange rate in duplication
Default Exchange RateSet a default exchange rate
Reporting
Add-Curr Exch. Rate - Acq CostAllow Acquisition cost in reporting
DepreciationAllow Depreciation cost in reporting
Write-DownAllow Write-Down in reporting
Add-Curr. Exch. Rate - Appre.Allow Appreciation in reporting
Custom 1Allow custom process in reporting
Custom 2Allow custom process in reporting
DisposalAllow Disposal in reporting
MaintenanceAllow maintenance in reporting

Click on OK to close